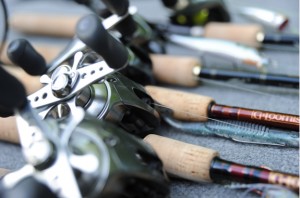
Sport Fish Michigan’s Captains Ben Wolfe and Ron Dohm fish for Michigan bass using hair jigs in shallow water. Learn how to select and use hair jigs and spinning rods for bass fishing success.
Category Archives: Equipment
Minn Kota i-Pilot Hands-Free Fishing
Captains Ben Wolfe and Chad Dilts fish for Michigan post-spawn walleye and show you how to get the best results with Minn Kota’s i-Pilot system.
Humminbird 360 Imaging – Locating Structure
Captain Ben Wolfe explains how to use a Humminbird 360 Imaging unit to help locate structure in front of and around the boat.
How to use a Fishhook Remover Tool – Catch and Release Fishing
Captain Ben Wolfe demonstrates the use of a fishhook remover tool, also known as a de-hooker), when catch and release fishing. Featuring cisco fishing with light tackle and blade baits in northern Michigan.
How to Transfer Humminbird GPS Waypoints
Captain Ben Wolfe of Sport Fish Michigan and Traverse City Bass Guide Service shows you how to transfer GPS waypoints from a Humminbird unit to a new Humminbird unit.
Vertical Jigging Basics for Salmon, Lake Trout, and Whitefish
Vertical jigging for salmon, lake trout, and whitefish can be as simple, or as complicated, as we want to make it as anglers. There are some very definite things that I think set apart those anglers which generally do well day-in and day-out overall, and those that hope to get lucky out on the water. Certainly, fish are fish, and every day is a learning experience that can be humbling.
Here are a few basic things that I feel are critical to understand for increased success when out on the water using a technique like vertical jigging.
Equipment:
Rods—Rods used for vertical jigging traditionally fall into 2 categories—small, short ice fishing style rods, or longer bass fishing style rods. There are pros and cons to each.
Personally, I use medium or medium-heavy bass rods for my vertical jigging needs. I like the additional length of a 6 -7 foot bass rod because I can move a lot of line on a hook set, while I still have the ability of making jigging motions as small or as large as I like. Some days, a jigging motion needs to be very small, but many days, the preferred jigging motion is larger, meant to really trigger an aggressive response from salmon and lake trout. I also feel that a longer rod is better able to cushion the hard tugs and pulls of lake trout and salmon. This way, the rod can fight the fish, not just the line.
Stout ice fishing rods are small and mighty, and really lend themselves well to a smaller jigging motion, as sometimes is necessary to trigger finicky fish. Whitefish tend to like much less action, and these rods make it hard for anglers to over-work a jig. While this is a plus, the big negative side to this style of rod is that an angler can move much less line on a hook set when a fish eats a jig as it comes up in the water column. I have missed many more fish with shorter ice rods than I have with longer bass rods, unless the fish hook themselves. There is a large following of dedicated jiggers that swear by this style of rod, but my preference lies with the longer bass style rod.
Reels—Fishing reels are kind of a no-brainer. Baitcasting reels paired with a baitcasting rod are my personal preference for jigging, but spinning rods also have a time and place. When paired with the proper rod, either spinning or baitcasting is a great option. I like to use the smaller bass size reels, as they get less tiring to use over a long day of jigging. Line capacity is often misunderstood, as most bass reels can easily handle 100-150 yards of line. That’s 300-450 feet of line! Considering that most jigging situations are in 150 feet of depth or less, there is more than double the capacity needed to jig and fight fish.
Lines—I always prefer braided line for jigging, tied to a fluorocarbon leader of about 6 feet or so. I typically use 15 pound Power Pro line which, over the years, has proven itself time and time again. Braided line fishes well even when twisted, unlike straight monofilament or fluorocarbon. Braided lines also offer a huge advantage in sensitivity—something that is needed to help detect the bottom when it’s windy or wavy out. Braided line also helps to get a good hookset when fishing in depths over 30 feet. With almost zero stretch, braid gets the hook penetrated almost immediately when the hook is set, as opposed to monofilament which has almost a 40% stretch factor. With a limber bass rod, braided lines won’t pull out of a fish’s mouth as many would believe, because the rod cushions the line. Fluorocarbon leaders are a must in our clear water, as fish can be line shy, even at depths of 100 or more feet. Fluorocarbon has the same refractive index as water, and is nearly invisible underwater. I prefer a 6 foot section tied directly to my braided line. Another added bonus of fluorocarbon is that it is much more sensitive and has much less stretch than monofilament. With braid as my main line, and a fluorocarbon leader, I am now ready to jig.
Jigs:
Jigs used for vertical jigging are as varied, and they all have their time and place. While each may trigger bites on any given day, there are a few basic things to understand within the jig category. How a jig falls, and the action that it gives when jigged, can have everything to do with how well a day can go on the water. Having a variety of jigs on the boat, and an open mind about experimenting, can really help to boat more fish. Also equally important can be jig weight. How quickly a jig falls can also play a large role in triggering bites, or going unnoticed and ignored. I prefer jigs anywhere from 1-3 ounces for lake trout and salmon. When vertical jigging a species like burbot or whitefish, smaller jigs can be the ticket. For these fish, I prefer jigs in the ½-1 ounce range.
I almost always use either a snap swivel or a line snap to attach my jigs. I nearly never tie directly to the jig when I am using treble hooks. However, when using jigs that have a single free-swinging assist-style hook, I will tie directly to the split ring, as these baits were intended.
Flutter / Butterfly style—this is a style of jig that is most commonly used in saltwater. These style jigs usually have a horizontal flutter fall, but within this category, there are differences in the upward motion. Some pull straight upwards when jigged. Others have a side-to-side flutter when pulled up in the water column – Jonah Jigs is a prime example of this style of jig, as are Shimano Butterfly jigs.
Corkscrew fall style—these style jigs are also often used in saltwater, and have a spiral action as they fall. Different species of fish seem to like these falls better. Lake trout and salmon often prefer a flutter style of fall in the water, but there are days when a corkscrew fall is the only way to trigger bites. The Shimano Coltsniper is an example of this style of jig. Swedish Pimples fall into both the flutter and corkscrew style categories, since jigging motion can create both actions.
Shad style—These style of jigs are more football shaped, more closely mimicking a shad body. They have action on the fall as well as a tight vibration on the up-jig motion. These baits work wonders when there is a big shad or alewife population that fish feed on, and here in the Great Lakes, alewives are a staple for salmon and lake trout.
S-shape style—This category of jigs has a slight bend in them, resembling a softly-curved letter "S". The bend in these jigs promotes a lot of water displacement both on the jigging motion up, and the fall of the jig. This not only produces an erratic action, it also has a lot of vibration, which can really help to bring fish in from a distance. BBM and Elk Rapids jigs are options for Great Lakes anglers. Jonah Jigs and PLine jigs can be bent to create an "S" shape, altering both the fall rate and action.
Do nothing style jigs—this is a style of jig that is most commonly used when the water is very cold. BBM makes a jig called a sand kicker. This jig does nothing, but jig up and down, with no side to side or fluttering action. Lake trout, whitefish, and burbot love these jigs when the water is cold, and they are often used by ice fishing anglers. Here, it is critical to tie the fluorocarbon directly to the jig without the use of a snap or swivel.
Bites:
Bites from salmon and lake trout can be varied, despite an aggressive nature overall. Understanding the different types of bites can help to land several more fish over the course of a day on the water.
On the fall/drop—Lake trout and salmon like to hit on the drop, as the jig is still falling through the water column. Bites on the fall can, themselves, be split into two distinct categories. First are the bites that occur as the rod is moving downward, following the jig on the fall. The bite occurs, and the rod is jerked down aggressively. An immediate hook set upwards is the way stick these bites.
The second way salmon and trout bite requires attention being paid by the angler. It’s not uncommon for a laker or a salmon to swim up in the water column to grab the jig, putting slack into the line. Anglers should be aware of how far they are lifting and dropping their jig, and should the jig not fall as far as it should, this is a sure sign that a fish has it, and a big hookset while reeling like crazy can often times stick these aggressive biters. A common telltale is a pile of line on the surface instead of a semi-taught line as the jig falls. This happens multiple times throughout most guide days, and the anglers that notice this are quite often rewarded with a fish that may otherwise have gotten away – the jig spat out quickly.
On the uplift—it’s not uncommon for bites to occur on the uplift of a jigging stroke. An angler is lifting the rod, and all of a sudden, there’s slack in the line when the weight of the jig should be keeping the line tight. A quick hook set is the only way to stick these fish, and a longer bass style fishing rod is critical here, due to the added ability to move line quickly.
Jigging away—When using good sonar units to mark fish, it is common to see our jigs fall towards fish. One way to trigger a reaction strike from lake trout and salmon is to mimic a fleeing baitfish. In order to get this kind of response, a jig can be jigged up and away from fish to trigger bites. A quick jig, reel several cranks, another quick jig, followed by more cranks of the reel is the most common method used to trigger these powerful reaction strikes. Another alternative form to get fish to chase a jig, is to just reel quickly away from fish that are known to be in the area. It’s fairly common to hook a fish reeling quickly when another angler on the boat has a fish on, and the angler is simply reeling up to get their line out of the way. On a recent trip, I had a fish chase my jig all the way to the boat from 87 feet of water, trying to eat the jig even as it came out of the water! Had I known I had a chaser, I would have slowed down just a smidge, to give the fish time to eat, but since I was focused on getting the net for my customer, I had no idea that I had an aggressive lake trout chasing my jig.
Boat control:
Boat control is critical in the sense that we need to understand how we are going to fish. Do we need the boat to hold in a specific spot because we want to fish a particular depth or contour break line, or do we intend to drift a flat covering lots of water looking for active fish?. To further discuss boat control means to break down into two categories how we intend to present our jigs.
For salmon and lake trout in particular, jigs should often be close to the bottom, if not occasionally bumping the bottom. If we intend to drift with the wind, we can use a motor, whether it is an electric trolling motor or a kicker motor, to hold the boat in a particular depth as we drift along. Using a drift sock can greatly slow the rate of drift, very often enabling us to feel the bottom. Drifting too quickly pulls the jigs away from the bottom, and more and more line must be let out to continually stay in contact with where the bottom is, and where the fish mostly hold. For this technique, boat speed is the crucial aspect that will help success rates.
For vertical jigging, the more vertical our presentation, the better our success when fishing a specific depth or contour break line. To hold in a particular spot, depth, or contour, I prefer the use of an electric trolling motor to accomplish the task, but a kicker motor put in and out of gear is a perfectly acceptable alternative. While holding on a spot, it is also possible to cast jigs out away from the boat, let them fall and jig them back with great results.
Putting the Gear Away for the Winter
It’s that time of year again. For us northern anglers, mid-November is the time where our bass fishing is winding down, and we start thinking about putting the gear away for an all-too-long winter. Many of us are thinking of tree stands and the deer rut, which here in the Traverse City, Michigan area, is in full swing.
My guide season with Traverse City Bass Guide Service is now finished for the year, and I am extremely thankful to all of my terrific customers for another busy, booked and fun season out on the Grand Traverse Bays and area inland lakes. We caught a lot of smallmouth (many of which were truly huge), shared a lot of stories and laughs and every single one of my customers was a pleasure to have aboard. I mean it—I’m not just being nice. Being booked almost every single day of the 5+ month long season is certainly something that I am thankful for this coming Thanksgiving. On another note, I can’t believe that Thanksgiving is next week already! Yikes!
I’ve written about it before, but one of the most important things for my customer’s on-going success and me is equipment that is in perfect working order. I take the reels off of my rods, and carefully spin each reel to make sure that it is as smooth as possible. I visually inspect each reel, looking for dust, grime, sand and whatever else that might hinder a reel’s smooth operation. My equipment should never be the reason why things don’t go our way on the water, and this reel inspection is something that has become routine for me at the close of each season.
I sort each reel into one of 3 categories. Those that are in clean, smooth working order (likely those that only saw action a couple of times, spending the vast bulk of the season in my Ranger Z-520’s big rod locker); those that need a little light cleaning that I can do in my shop; and those that need some repair or more in-depth maintenance. Using exclusively Shimano reels, to me, means that I have fewer hassles in general, but also being on their guide/pro staff means that I have the luxury of using newer equipment than many. Despite this, I still try to take the best care of my equipment that I can.
For those that need more maintenance than I can do easily in my shop, I send them out to a qualified reel repair company, and set down to do the task of cleaning and lubricating the ones that I can do myself. Once this simple task is done, I always make sure that I leave the drag on each reel very loose. I don’t want excess tension on the drag, which will put undue pressure and wear and tear. This will also help prevent a “sticky” drag, where certain portions of the drag stick. I want each reel’s drag to be silky smooth, with no hesitations or sticky spots. By loosening the drag between fishing seasons, I can help to ensure this.
Of course, remember to tighten those drags when you do get out on the water next spring! There are few other great ways to start a string of four letter words than by trying to set the hook on a trophy bass in the spring only to find that the drag wasn’t set! Trust me on this!!!
Hook N’ Look
What a difference a couple of weeks can make! 3 weeks ago, I was thrilled to film a tv show, Hook N’ Look over the course of 3 days with Kim and Danny Stricker. The weather was crappy—heavy winds all 3 days, and rain for two of them. Perfect for showing off raingear, but difficult to film in, considering the high-definition cameras and sensitive microphones. Sure, the fish are already wet, and we’re in a boat designed for water, but wow was it uncomfortable. Thank goodness we were also highlighting my coffee company, Deep Blue Coffee. Few things can warm up a chilly and wet day on the water than a great cup of hot coffee!
Filming a spinnerbait show, showcasing the Strike King tour grade painted blade spinnerbaits, we needed wind to help promote a hot bass bite. Well, we got wind—a little too much of it, however. We were able to connect on a few, and got a few more to chase and bump the spinnerbait, but overall, it was not a great bite to really show off this technique. As a full time guide, this was a little puzzling. The fish were shallow; there was the right water temperature zone; there was wind to help promote a shallow spinnerbait bite; and there were baitfish present. All signs that there should have been a phenomenal spinnerbait bite.
The fish, however, don’t always seem to follow our human best laid plans. And very often, in very frustrating fashion, they do their own thing. Given the seemingly perfect conditions for this kind of bite, it became very apparent that we would have to grind it out, taking an overly persistent mindset. Having confidence in an area was key for our shoot. I knew from years of experience where the fish were. Just getting them to bite on what we wanted them to bite on, for the sake of a spinnerbait show was the issue. Sure we probably could have gotten more bites using other baits or techniques, but if you’re going to film a spinnerbait show—you have to throw a spinnerbait! Not having confidence in the areas we were fishing could have led us all over northern Michigan’s prime smallmouth water, but at the end of the day—if you know the fish are there—don’t leave fish to find fish. Just fish, and make it happen.
In all, filming with Hook N’ Look was a great experience. Kim, Danny and my friend Capt. Kyle Buck (who was driving my Ranger Z-520 as the camera boat) all shared a lot of laughs, caught some fish, filmed a show, and drank A LOT of Deep Blue Coffee Company’s coffee. Would I do it again? In a heartbeat!
Thunderstick
Simms event
I recently attended the Simms Ice Out Guide Event in Bozeman, Montana, and had the great fortune to not only meet some fantastic people, but to be surrounded by similar-minded fishing nuts. Continue reading


